
Follow the mentioned steps to create a purchase order.
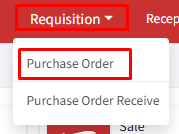
Step 1: Go to Requisition > Purchase Order.
Step 2: Click ‘+Generate Order’ or ‘Create Today’s PO’.
Step 3: In the case of ‘+Generate Order,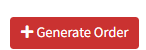 ‘ select the items to be purchased from the item name drop-down list, then select the quantity and click on add. You can add multiple items to a single purchase order.
In the case of ‘Create Today’s PO’![]() a list of items will be displayed on the right section of the screen. This list will only show items that are scheduled to be ordered today based on the purchase schedule you’ve set for them.
a list of items will be displayed on the right section of the screen. This list will only show items that are scheduled to be ordered today based on the purchase schedule you’ve set for them.
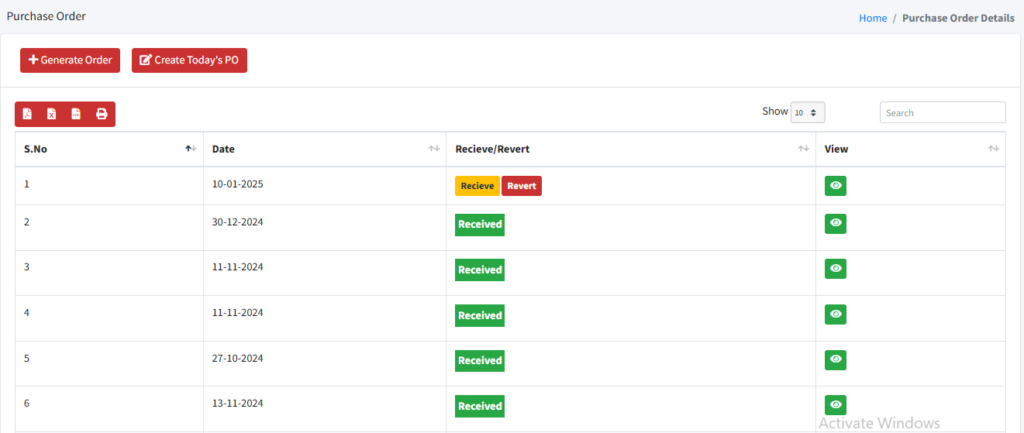
Step 4: Click ‘Submit’ to create the purchase order. A window will pop up where you can choose the date you want the purchase order to be for. Once you’ve selected the date, click ‘Save’ to finalize the purchase order. Upon clicking ‘Save’, the system will automatically redirect the user to a print page where they can generate a hard copy of the generated purchase order.
Step 5: Return to the purchase order home/index page. The ‘Receive/Revert’ column provides options to either receive or cancel the purchase order.
Step 6: On receiving the purchase order (after purchase of items), click on the ‘Receive’ option.
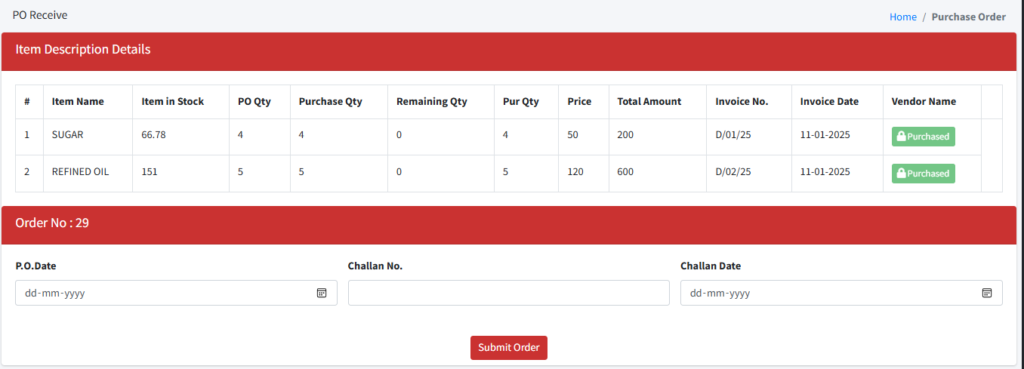
Step 7: Enter the details of purchased items like purchase quantity, price (price of 1 unit), total amount, invoice number and date, and vendor name. Once all information is entered click on add.
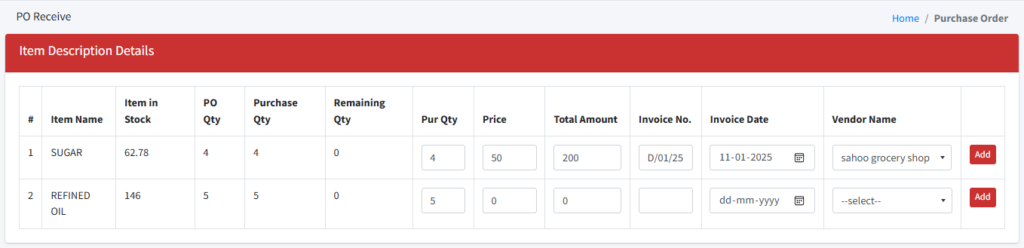
Step 8: After adding all the information for purchased items, fill in ‘P.O. Date’, ‘Challan No.’, and ‘Challan Date’. Then submit the order.
The purchase order has been generated successfully. The system has automatically updated your inventory to reflect the newly purchased items.
Need help?
Have you any question which is not answered in this knowledge base? Contact us. We are here to help you.